If you want glow on your face and even after a lot of efforts and using many DIY, you are not getting glow on your face, then now you are thinking that let's take some professional treatment which will be expensive but you can get some results. Therefore, I would like to tell you that before doing any professional treatment, try this facial at home once, if you feel that yes, then some results are coming and if you keep doing this again and again, the results will increase. You can save your pocket by doing this facial at home there is a lot of money you can save. Today in this blog we are going to talk about a facial that can be done at home which is very easy to do, all the ingredients are almost available in our house and the biggest thing is that I have tried it on myself too, and have also tried it with my friends who have got very good results.
This is also a very good facial DIY for brides which will give great results even after using it once. So let's start, I will try to tell you each step in a better way so that you do not make any kind of mistake.
Read more - Get Crystal Clear Glowing Skin with Glycerine
Step 1: Cleansing – Lay the Foundation
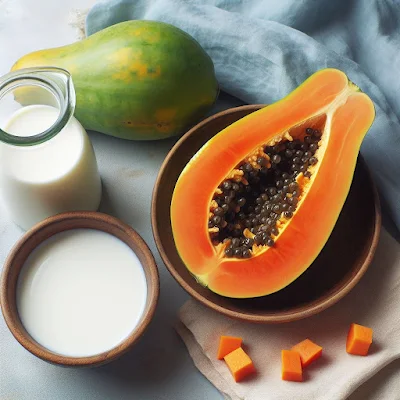
Cleansing is a very important step because it contains the foundation of your facial if you have not cleaned your face properly, then anything you apply on top of it will not work on your skin. So for cleansing, you have to use two ingredients, first ripe papaya. Meaning, the riper your papaya is, the more papain enzyme it will have inside it. Papain enzyme has been proven by science that it helps us a lot in removing our tanning, refining our pores and increasing the elasticity of our skin. First of all, you will mash it and add some milk inside it, milk contains lactic acid which helps in purifying and refining the skin.
You have to massage your face with the combination of papaya and milk for 10 minutes. When you are massaging, make sure that your movements are always upward and outward, so that the chances of your skin becoming loose are minimized and you get the best results.
Step 2: Steam Your Face – Revitalize with Hot Compress
Steam is necessary so that all the blackheads, whiteheads and dead cells accumulated on the skin become soft and you can deeply clean the skin without creating any pressure on your skin. We will not give steam in the same way as the normal steamers come to give steam, we will use a hot compress here. Hot compress means that you have to take boiling water in a vessel and dip a towel inside it, squeeze it, and after squeezing, place the towel on your face and put a little pressure on it so that the heat is there. Your skin can feel it and your skin feels the warmth. All the toxins inside the screen will melt and start coming out and your screen will start rejuvenating. You have to repeat this process 4 to 5 times so that the pores of the screen get refined properly.
Step 3: Scrubbing – Gentle Exfoliation
Scrubbing means a step where we will work to reduce the dead cells of the skin and remove the whiteheads and blackheads. We have softened them, here we will work to remove them through steam.
You have to take one spoon of gram flour and half spoon flour, here we will take curd, after this mix them all well and make a paste of all these and apply it on the face. Leave it for a minute and then massage your face thoroughly for 10 to 15 minutes, Because this is a scrub step, still you can massage for 10 to 15 minutes because we have not used any granules in it, there is no granular scrub. It is grain-free so you can massage it comfortably for 10 to 15 minutes, after that wash your face and after washing your face is ready for massage.
Step 4: Face Massage
To massage this facial, we need only three ingredients:
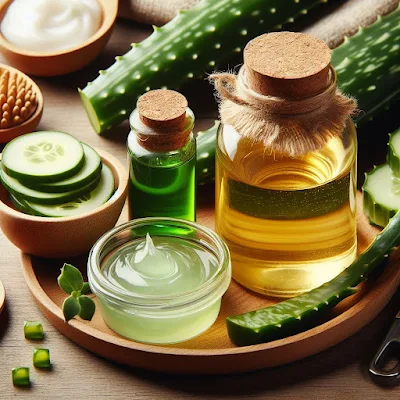
First of all, you need aloe vera gel, if possible you should use only organic aloe vera gel. It should not be plant-based, because many times we take plant-based but it is not at all necessary that the plant we have in our house is of the same variety. Which is suitable for the skin for this reason many after applying aloe vera gel, people start complaining that rashes have appeared on their skin, the skin turns black, the screen becomes sensitive or small rashes appear on the skin, so make sure that the aloe vera gel is 100 per cent, use only that which is organic.
Take 2 spoon of aloe vera gel, add half spoon of glycerine to it and add 1 spoon of cucumber juice (If cucumber juice is not available then you can also take orange juice, if you take either of these then both will work.)Once the paste is ready, apply it on your face, it is a good massage cream for your skin in winters. This will bring glow to your face and your skin will also become shiny, fair and tight.
Keep in mind that whenever you massage, you should always massage in upward and outward directions, so that along with giving relaxation to the muscles of your screen, you can give the toning effect that you want. After massaging for 15 to 20 minutes, wash your face and after washing, it is important to give you a cold compress once again. Cold compress is necessary because whatever ingredients you have put in, by chance, if your skin is allergic to it, then cold compress is necessary. By compressing the ingredients instead of going into the pores automatically. You will get the results when they come out but they will not create any side effect on your skin. I have told you how to give a cold compress in step number 2.
Step 5: Use of Face Pack
To make a face pack we need some ingredients:
One spoon of honey (there are many humectant properties inside the city, dryness does not come on top of the skin). Half a spoon of Gram Flour, Half a spoon of lentil powder, and Raw Milk as per requirement, mix these four things well, apply it like a face pack and after applying it, leave it for 10 to 15 minutes and then apply it on the face. After this wash the face thoroughly.
This is a great facial that is tailored for you, so now your skin is thanking you because you gave your skin everything it needed. After using this, you will forget all the salons you go to, facials you take, and expensive treatments you take, because this is going to give you great results at home.


Comments
Post a Comment